Adding Codecs to a Domain
If a codec is added to a domain it becomes visible within TieLink, the TieServer Console, and the Cloud Codec Controller. To add a codec:
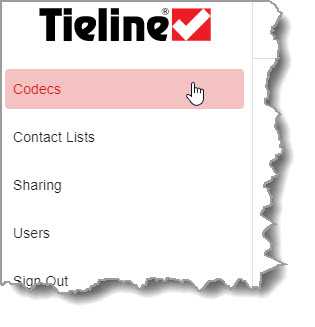
1.Select Codecs.
2.Click Add a Codec  .
.
3.Enter the serial number and MAC Address of the codec to be added.
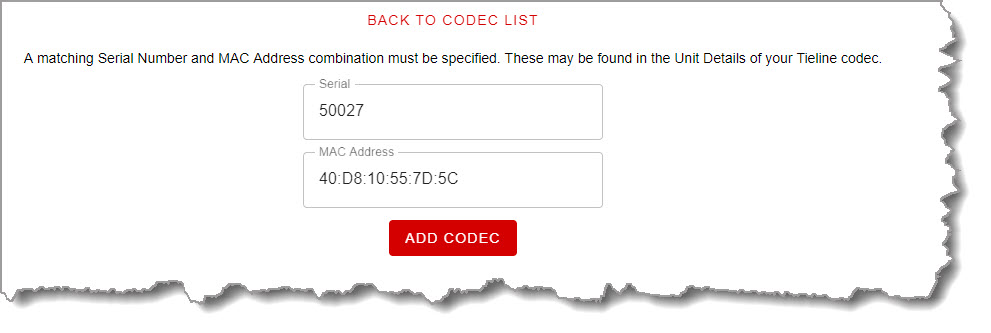
4.Click Add Codec to add the codec to TieLink and the TieServer domain.
5.The codec will appear in the list of domain codecs.
Enabling TieLink on a Codec
By default TieLink is disabled in a codec and needs to be enabled before it is 'available' in TieLink. To enable this on a codec using the Toolbox Web-GUI:
1.Open the HTML5 Toolbox Web-GUI and click Transport in the Menu Bar, then click TieLink to open the TieLink panel.

2.Click Edit and ensure Enable TieLink is On, then click to select On/Off buttons and enable required interfaces.
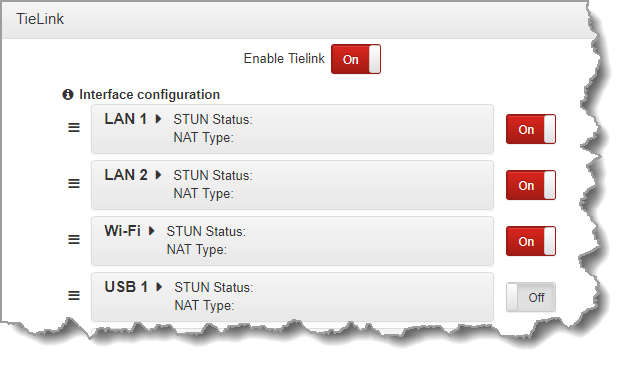
3.Click Save.
|
Important Note: See Codec Configuration Overview or the user manual for each codec to learn more about TieLink configuration and operation when dialing connections. |

Codec Status/Availability in TieLink
The Codec Status on the Codecs screen in TieLink displays a codec's availability. Codecs can be:
1.Available: A codec is connected to the TieLink Traversal Server Network, has provided reachable streaming interfaces, and has indicated it is not busy.
2.Busy: A codec is connected to the TieLink Traversal Server network and has indicated it is busy.
3.Unreachable: A codec is connected to the TieLink Traversal Server network, but cannot provide a reachable streaming interface. Note: The codec may not have been able to set up STUN.
4.Offline: A codec is not connected to the TieLink Traversal Server Network.

Stream Status in TieLink
The availability of an audio stream is also indicated within TieLink and the status may display:
1.Available: The TieLink Traversal Server Network has provided reachable streaming interfaces and indicates the audio stream is not busy.
2.Busy: The codec is connected to the TieLink Traversal Server network and TieLink indicates the stream is busy.
3.Offline: The codec is not connected to the TieLink Traversal Server Network and the stream is not available.
See Codec Configuration Overview for more details about how it is necessary to select the Advertise on TieLink check-box when creating a codec program. A codec stream will not be visible in TieLink unless the Advertise on TieLink check-box is selected on a loaded codec program.
Editing Codec Settings
Click Edit to adjust and manage settings relating to a codec, including sharing of individual codecs and audio streams to external TieServer Domains.

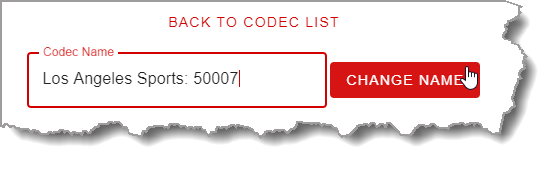
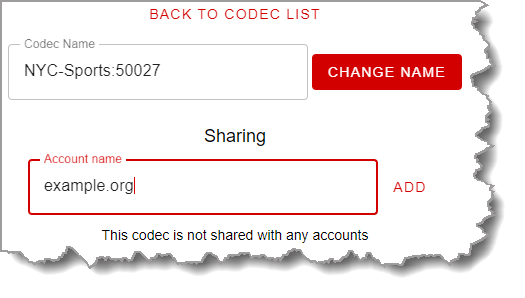
Edit a Codec Name
To edit the Codec Name, then click Change Name  .
.
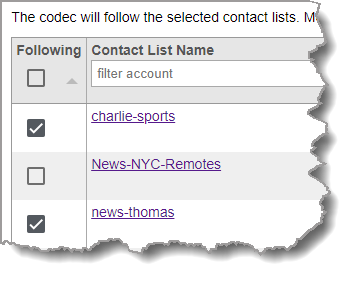
Add or Remove a Codec from Following a Contact List
Click the Following check-boxes to select and deselect a codec from contact lists the codec is a member of. Members of selected lists will appear in the address book of the codec.
Share a Codec with another TieServer Domain ( External Account)
In the Sharing text box enter the external Account Name (e.g. example.org), then click Add.
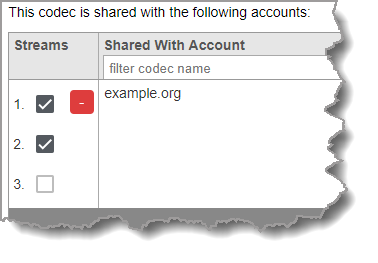
Add or Remove Streams Shared with an External TieServer Domain
Click the Cross symbol in Streams to expand and view all streams for a codec, then click to select and deselect streams as required. Note: If streams are deselected, it is necessary to Remove the codec and then share it with the external TieLink domain again to re-enable all audio streams.
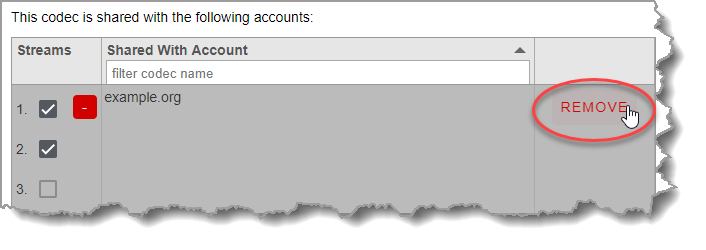
Remove a Codec from Being Shared with an External TieServer Domain
Click Remove for the external shared account.
Remove a Codec from TieLink and a TieServer Domain
Click Remove Codec  .
.

|
WARNING: •This deletes the codec completely from the TieServer Domain and all software applications. E.g. if you remove a codec from a domain it will no longer be available in TieLink, the Cloud Codec Controller and Report-IT Enterprise user accounts (TieServer Console). •DO NOT REMOVE A CODEC if you are unsure if it will impact on all these software tools. •After deletion a codec needs to be fully reconfigured if it is added back into the domain. All settings and associations in Report-IT, and groups (etc.) in the TieLink Traversal Server, are deleted when a codec is removed from a domain. |